I'm sure many of you can relate when I say that my stamping addiction has caused me to outgrow my craft space. Unfortunately increasing my floor space isn't presently an option, so "plan B" Renovate!
I needed more place to put " My stuff" A major revamp was a must. Without added floor space, I needed to find a way to create more storage in the space I already had. Thankfully I have a very loving an supportive husband that is so understanding and accommodating when I get these sudden urges to turn the house upside down and renovate (my husband is a carpenter by trade).
So to start with, let me show you what I had and then I will show you what the new room looks like. The first photo below is what used to be my guest work station. Basically a place by the window for someone to work at when they came to card make with me. To the left was a book shelf where I kept all my stamps. I outgrew this and had nowhere to put more stamp sets.
The Old Room

This next photo is taken with me standing at the entrance into my craft room, guest station to the left. Straight ahead was a 10 foot work counter with storage cabinets above and below. To the immediate right (not very visible) was my work station which you can see more clearly in the next two photos. Notice the two rolling file carts that I use for my paper storage? Previously these carts floated around and got in the way as I had no place to tuck them out of the way.


My old work station. Everything was relatively tidy but I had limited work space and I found it frustrating.


Ok, so here's where I start to renovate!

Of course no renovation would be complete without a fresh new colour on the walls!

Starting to reassemble the cabinet sections in a new configuration.


Finally the new improved craft room!!!
Standing at the entrance looking in. My work station is now straight ahead instead of to the immediate right.

My work station is much larger and notice how one of my file carts fits neatly under the counter so I'm no longer tripping over it. My stamps sets are all now above and in front of me. See the empty space? Which means I can now buy more stamps cause I have a place to put them. Woo Whoo!

Remember my guest work station and ugly book shelf where my stamps were stored? Well, not any more. Now I have a counter space for my lap top or Cricut when need. I built a new shorter white book shelf where I now keep all my Nestabilty dies, my Christmas stamp sets and extra card stock. Notice how my second file cart fits nicely under this counter. No more carts floating around the room and getting in my way. I also added a wire cart to hold all my loose ribbon, air compressor and misc. embellishments, etc.

Remember my old work station? Well, now its the big shot station. I added a book shelf at the end of the cabinets to provide more storage. And one of my favorite additions is the wonderful Lazy Susan style tower I designed and my father helped me build. I use it for storing punches, stickles, liquid pearls, water colour crayons, etc. My case of Copic markers fits nicely in the top. Its on wheels so I can roll it near me and give it a spin to find whatever I need.

Here's a better look at my Lazy Susan as well as another bit of cabinetry where my printer lives.


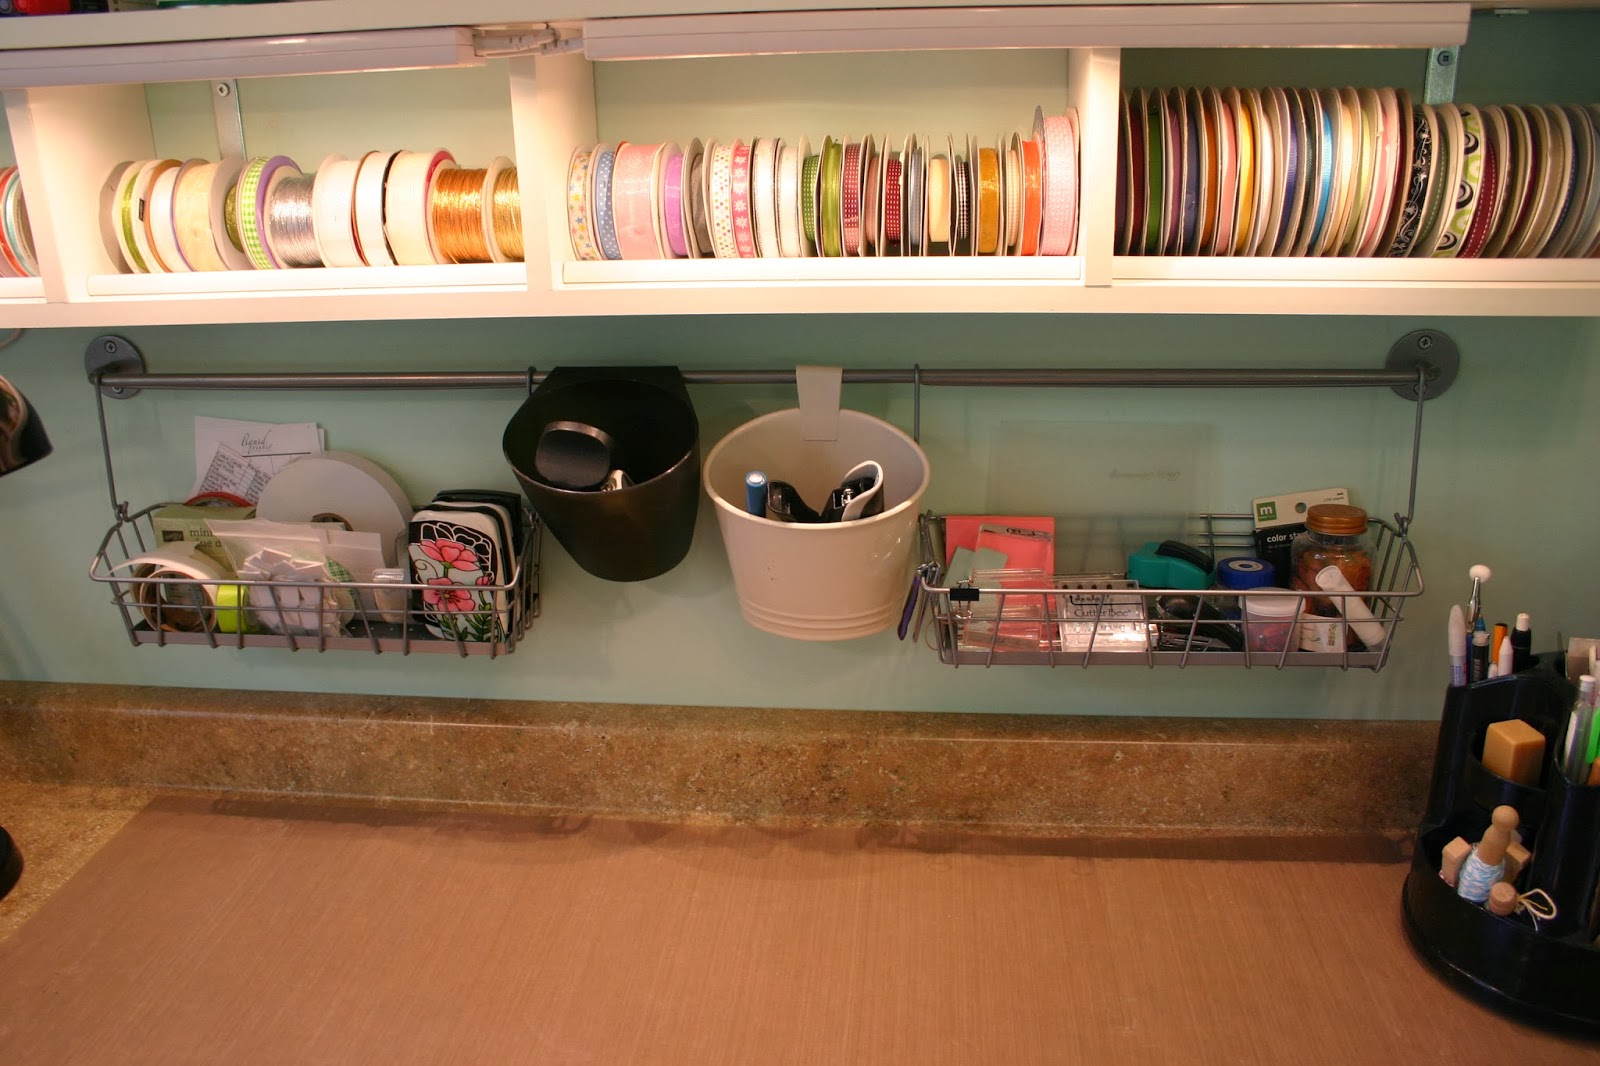
I love my storage for my rolls of ribbon.
There's still a couple things to finish, like the counter top edges, etc, but over all I'm pretty happy with my new space.


Photo below: This was previously just one of those ugly battleship grey storage things from Home Depot that guys usually use to store screws and nails, etc. Well I sprayed mine with white Krylon spray paint and use it to store all my pearls, gems, flowers, etc. and it now it looks pretty!

Well, I hope you've all enjoyed touring my craft room and that I've been an encouragement to those of you that are struggling with limited space. With careful planning, even a small space can work.
In my next post, I'm going to give you an even closer look at how I organize and store my stuff.
Thanks for stopping by. Hugs!
Laurie